Creating your account
Click on a section title to jump down the web-page:
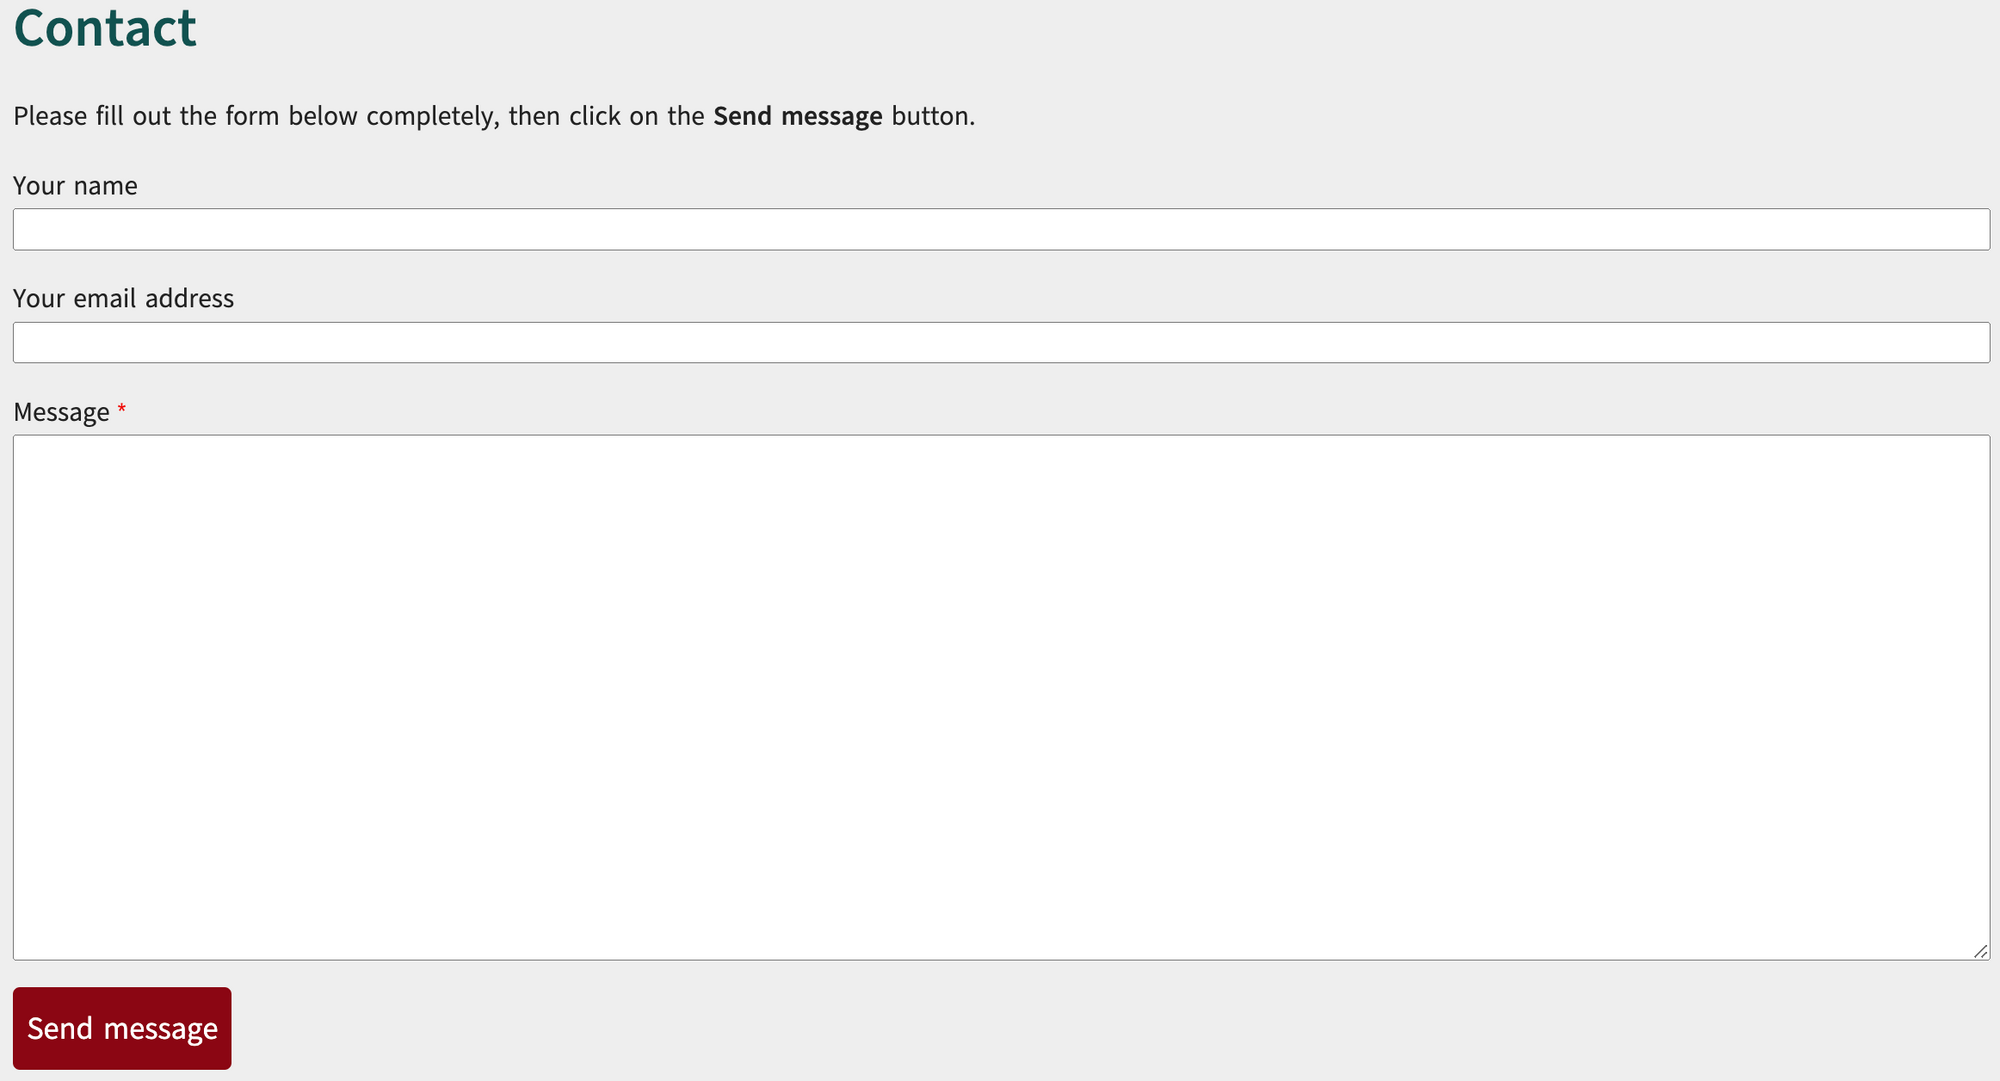
F. Customize the system Contact page
A. Introduction
1. Navigate to the Overview screen by clicking on Work with pages in the Wildfire menu, then clicking on sub-menu item Overview.
You will see a chart displaying the pages and menu structure of your website.
2. Each Navigation Language has a column in the chart.
3. If a page has been created in a language, the page title is listed under that language name.
a) Published pages are listed in upright font with light background.
1) To unpublish a published page, click on the blue dot beside the pencil icon.
b) Unpublished pages are listed in italics font with darker background.
1) To publish an unpublished page, click on the white dot beside the pencil icon.
B. Preview or Edit a page
1. To preview a page, click on the page title.
2. To edit a page, click on the small pencil icon to the right of the page title.
C. Set up your website menu
1. The position of the items in the website menu is indicated on the Overview chart by the vertical and horizontal location of the page title.
a) The order of your pages shown in the Overview chart from top to bottom indicates the order of your menu items on the website menu.
b) Top-level menu items are those with the page title farthest to the left; next-level menu items are those with the page title indented to the right.
c) The page titles that you wrote are the menu item titles, unless you created a different menu item title (see Chapter 6, Section B, Step 4).
The images above show how these features work.
1) The page Home is at the top of the Overview chart, so it is first on the website menu (farthest to the left on a horizontal menu).
2) Example is unpublished, so it does not show on the website menu.
3) Page 3 is the next published page on the Overview chart, so it is next in order on the website menu.
4) Page 4 is indented to the right under Page 3 on the Overview chart. It does not appear on the main level of the website menu. To see it, you must click on menu item Page 3, then Page 4 will appear on a sub-level of the menu.
2. You can change the order and level of the menu items on your website.
a) On the Wildfire menu, click on Work with pages, then click on sub-menu item Arrange menu links.
b) A simplified version of the Overview chart appears.
3. Change the order of a menu item by changing its position on this chart up or down.
a) Move the mouse cursor over the four-pointed arrow to the far left of the page title.
b) Click and hold.
c) Drag the arrow up or down to the desired position on the chart.
d) Release the click.
e) When you change the position of pages on the chart, a warning message appears, prompting you to save your changes.
1) Click on the Save button at the bottom left.
4. Change the level of a menu item by changing its position on this chart right or left.
a) Move the mouse cursor over the four-pointed arrow to the far left of the page title.
b) Click and hold.
c) Drag the arrow right or left to the desired position.
d) Release the click.
e) When you change the position of pages on the chart, a warning message appears, prompting you to save your changes.
1) Click on the Save button at the bottom left.
D. Advanced actions
1. To add more function icons to the Overview screen and chart, click on the link Show advanced actions at the top right of the chart.
2. An additional button appears above the chart, and additional icons appear on the chart itself.
3. Add new menu item
Note: This function can also be found on the screen at Work with pages => Arrange menu links.
To structure and organize your website menu, you may find it helpful to have one or more menu items without associated pages.
This allows you to group several pages into a category. The menu item (the category) doesn't need a page; it is a placeholder in the menu. You may save space on the top menu level, and it looks neater and is easier for the website visitor to understand.
For example, you may have several website pages with video items. Create a menu item titled Videos, with no associated page. Then group (indent) the video pages under this menu item. (See the following images.)
a) Click on the button Add new menu item.
b) The Add new menu item task box appears.
c) Write a menu item title in each Navigation Language.
d) From the drop-down list Menu section, choose where on the current menu the new menu item is located.
e) Click on the Save button.
f) The menu item appears at the bottom of the Overview chart in dark grey font and is not a link (not clickable).
g) You may move the menu item on the Overview chart and indent other menu items under it, as desired. (See Section C of this chapter.)
4. Added Delete icon
a) On the Overview chart, click on a trash can icon to delete a page.
b) A pop-up window will ask you to select which Navigation Languages you wish to delete.
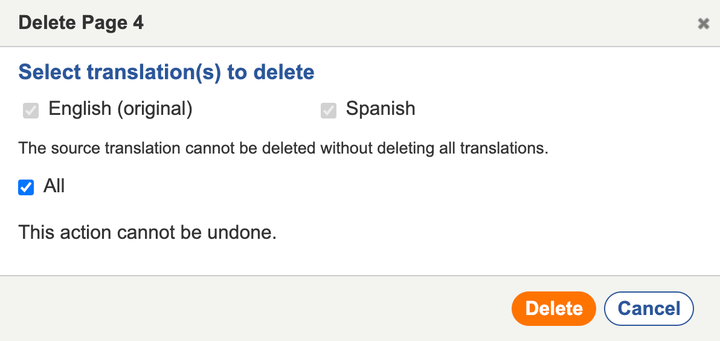
(1) The default setting is All languages.
(2) If you wish to delete only some of the languages, click on the checkbox to deselect All, then click above to select which language(s) to delete.
c) Click on the Delete button to finalize the action.
5. Added bulk actions
a) Click on the boxes next to page titles to select pages for bulk actions.
(1) Click on the box in the top blue bar to select all pages.
b) Click on the drop-down list - Select bulk action - at upper right.
c) Select an action: Publish, Unpublish, Delete.
d) Click on the button Apply to selected.
e) Depending on the number of pages and the action selected, it may take the system some time to perform the bulk action.
6. Added chart filter
a) Click on the link Filter list at the upper left of the Overview chart.
b) The Filter list task box appears.
c) Enter or select options to filter the list on the Overview chart.
1) Words in page title or page text
2) Content type: Page or Menu item
3) Publication status: Published or Draft
d) Click on the Apply button.
e) The Overview chart will show only those items that match the filter criteria.
7. Remove the advanced actions from the Overview chart by clicking on the link Hide advanced actions.
E. Copy a page
1. Click on the link Show advanced actions at the top right of the Overview chart.

2. On the Overview chart, click on the indicated icon to copy a page.

3. The page is immediately copied and added to the Overview chart. It will be at the bottom of the chart in the section titled Pages not in the menu.

4. Click on the small gear icon at the far left of the row for the new page.
5. A pop-up window prompts you to give the page a new title.
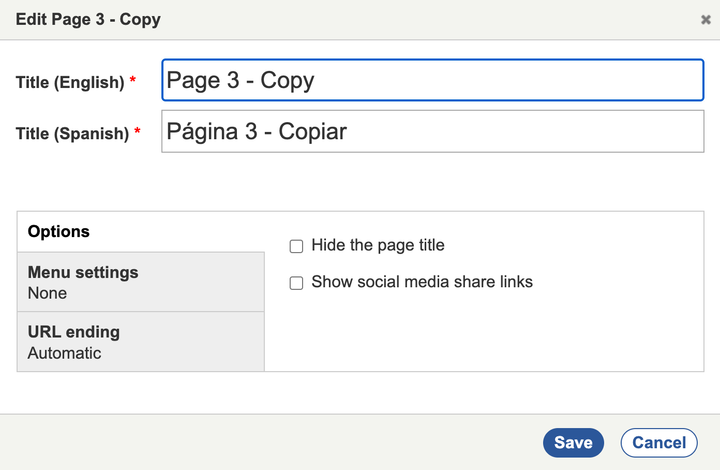
6. Write a new page title in all Navigation Languages. You may also configure page options, menu settings, and URL ending via the tabs in the lower section of the pop-up window.
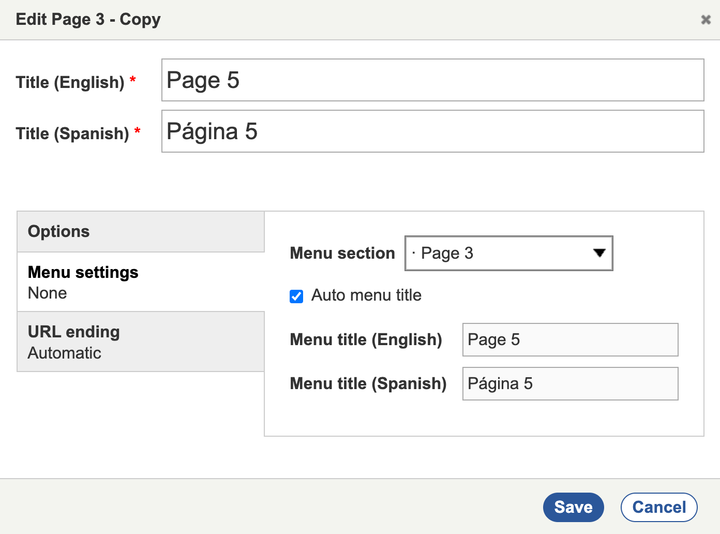
7. Click on the Save button at the bottom of the pop-up window.
8. The new page is located on the Overview chart according to your selections.

a) Note that the page is still shown as unpublished (gray background).
9. Click on the pencil icon to open the page in the Layout Editor.
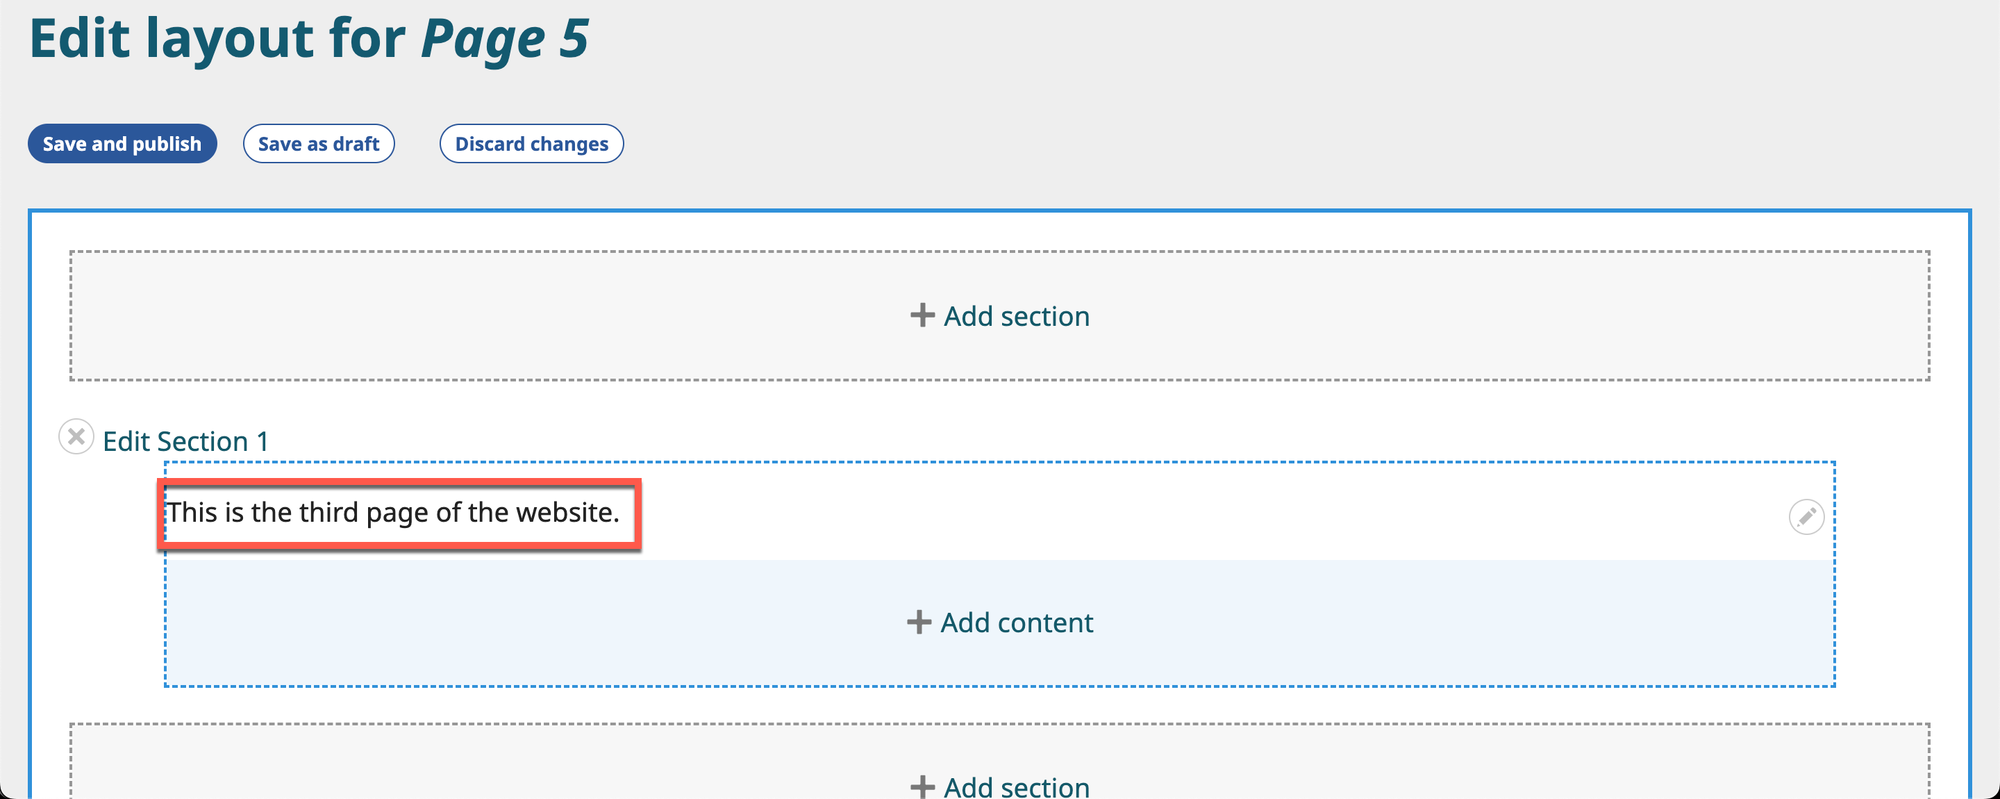
10. Note that any page content will be from the original page and will need to be edited.
11. After editing page content, click on either Save and publish or Save as draft.
F. Customize the system Contact page
1. All Wildfire websites include a system-generated Contact page.
a) This page is not normally shown on the website menu. Website visitors access the Contact page using a small link at the left end of the website footer.

b) The text on the system Contact page is preselected.
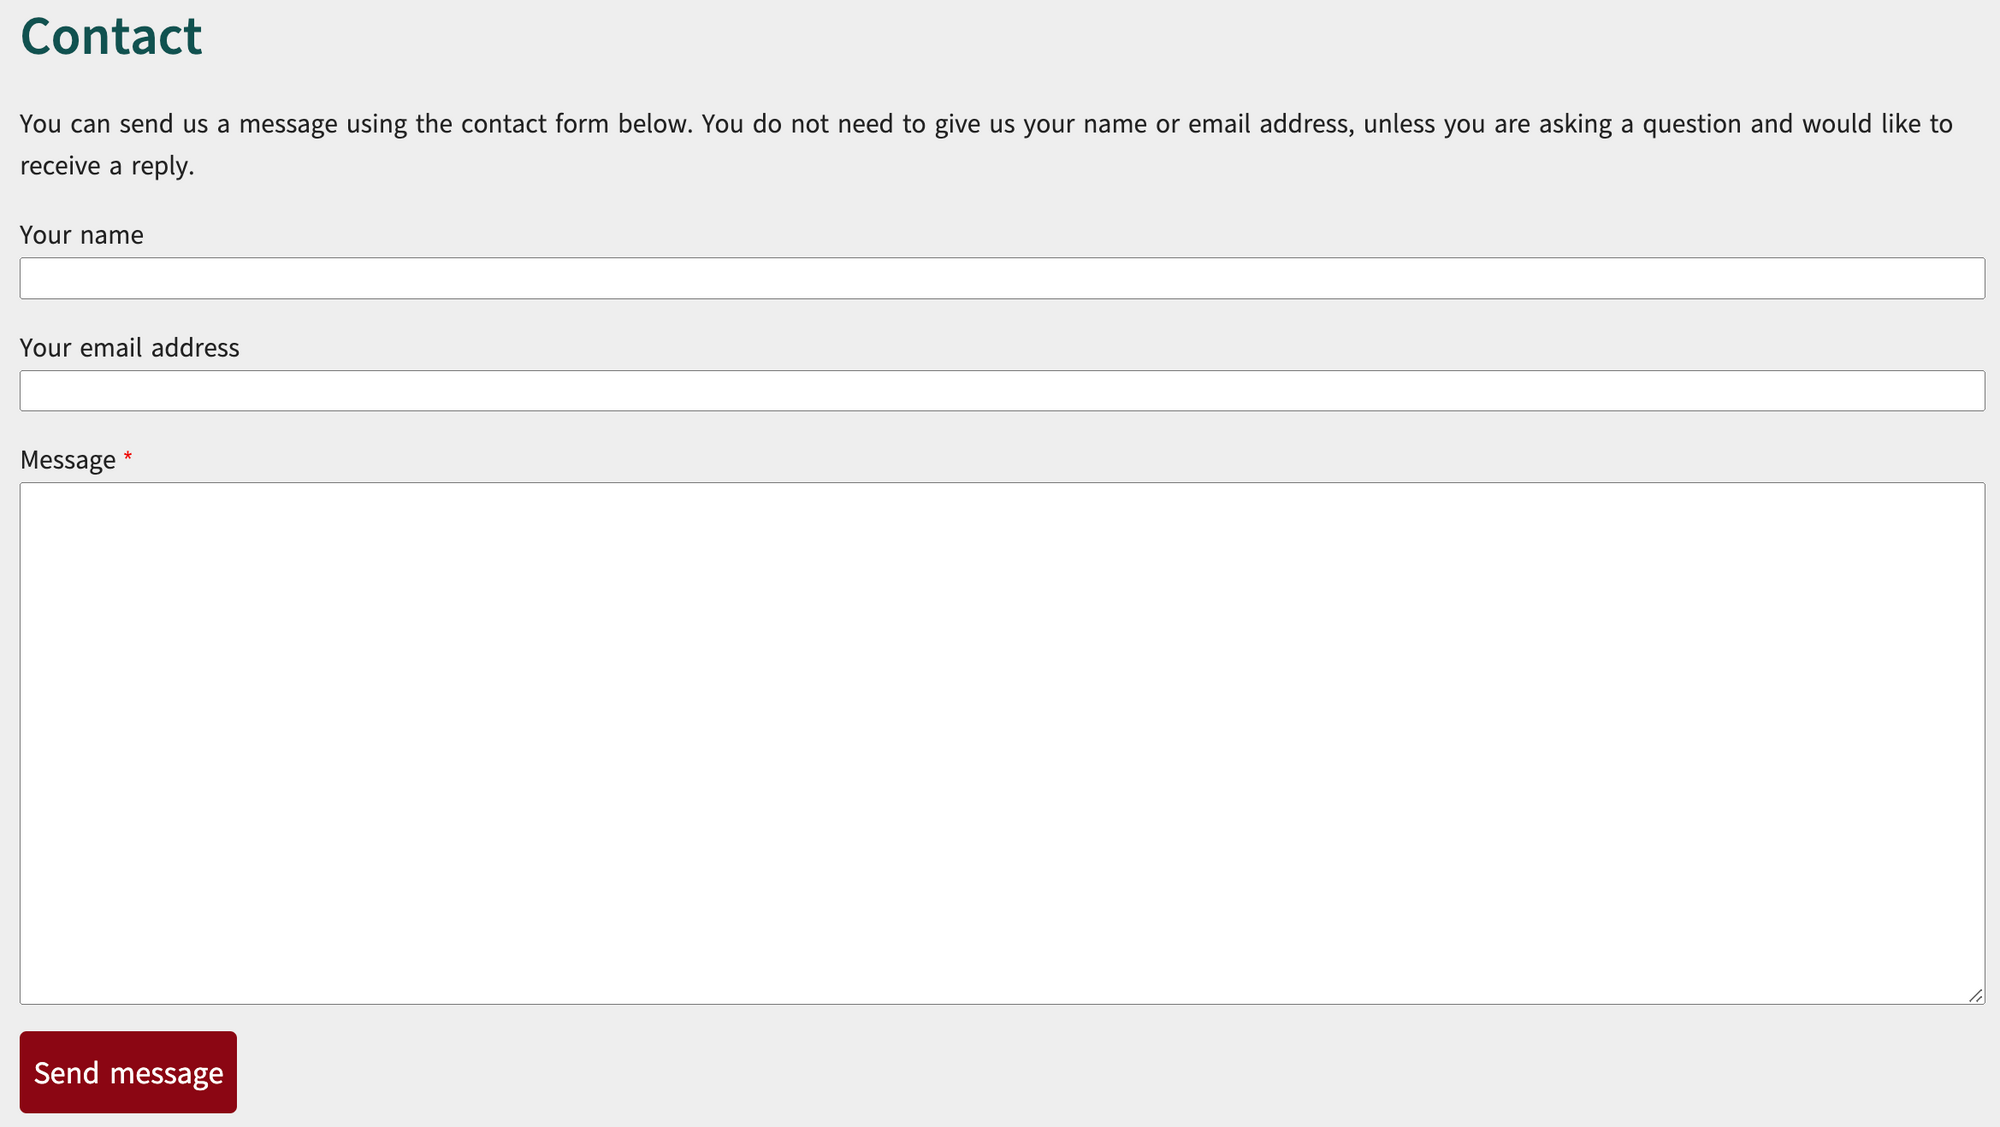
2. You may change or add to the text at the top of the form, and you may also add text below the form.
a) The titles for the data fields (Your name, Your email address, Message) may not be changed.
b) The process for editing this form is different from the normal page editing process.
3. On the Wildfire menu, click on Work with pages, then click on submenu item Arrange menu links.
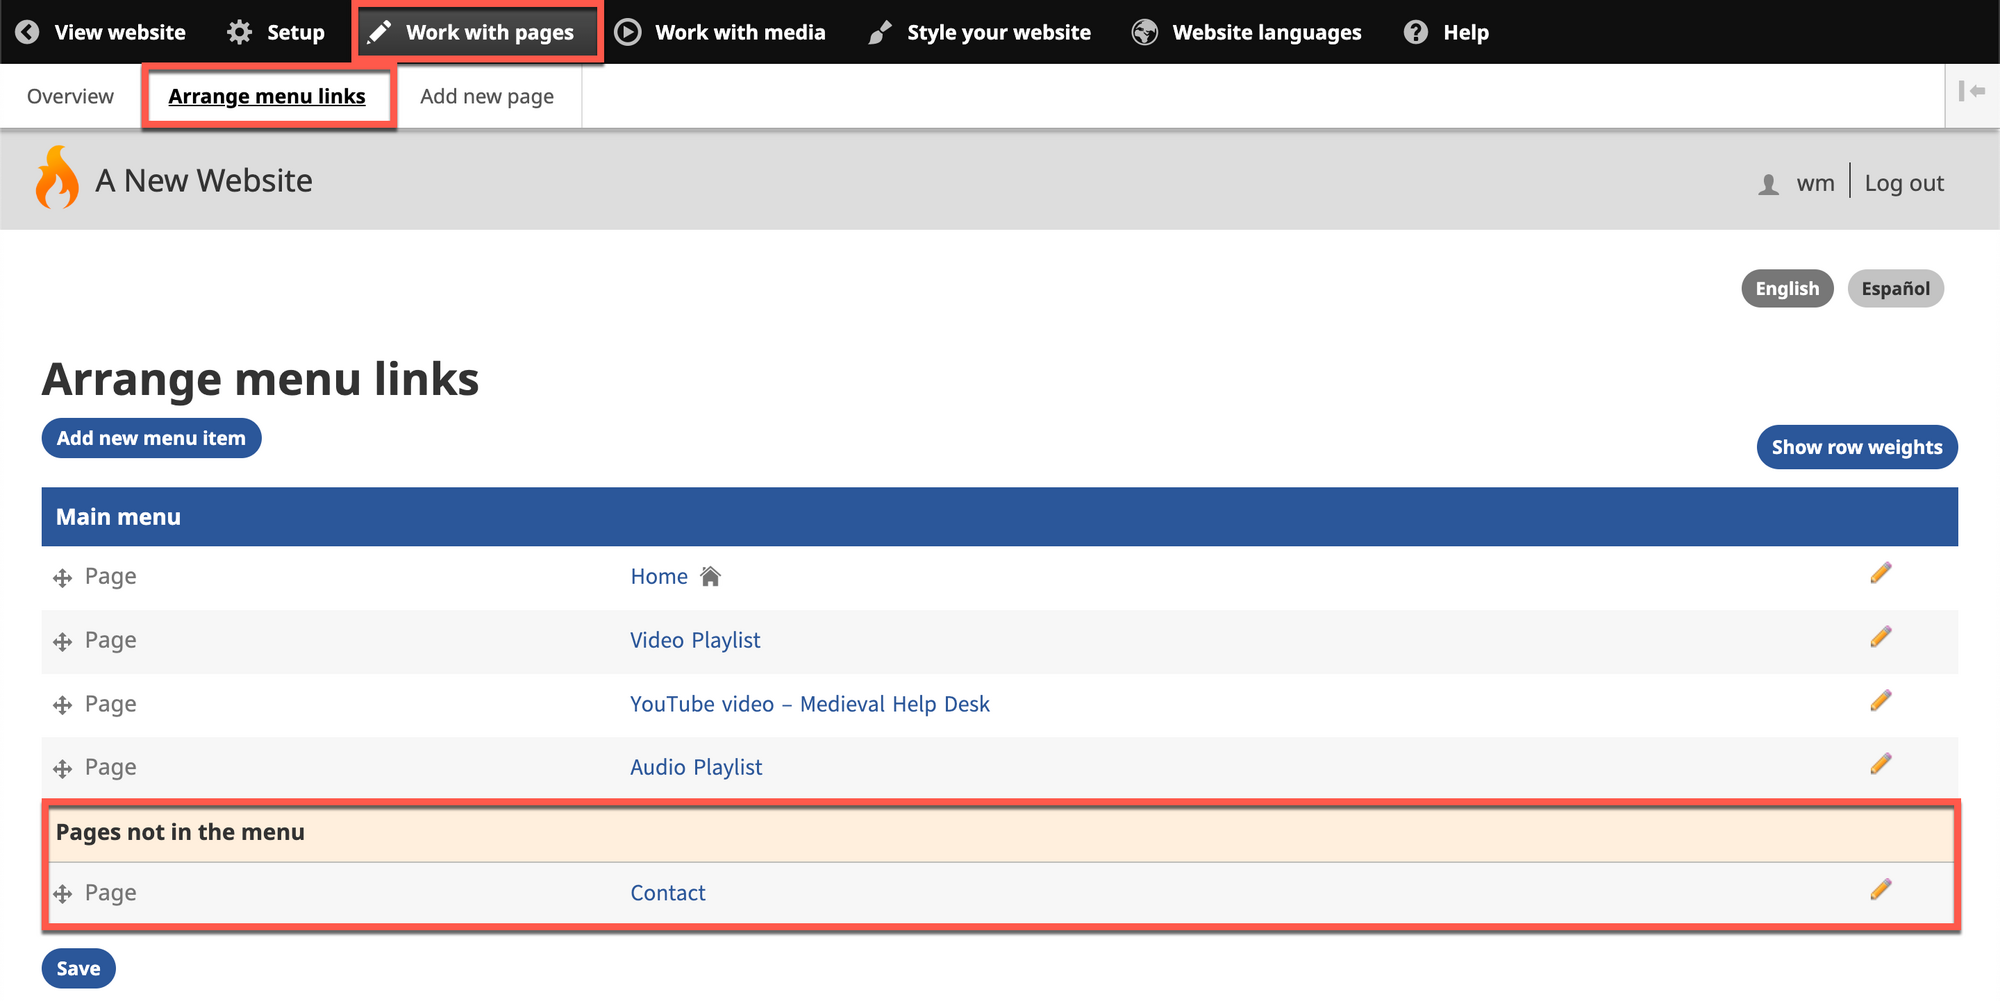
4. The Contact page is at the bottom of the chart in the section titled Pages not in the menu.
5. Clicking on the pencil icon on this screen does not lead you to the Layout editor screen. Instead, click on the page title Contact to open the page in preview mode.
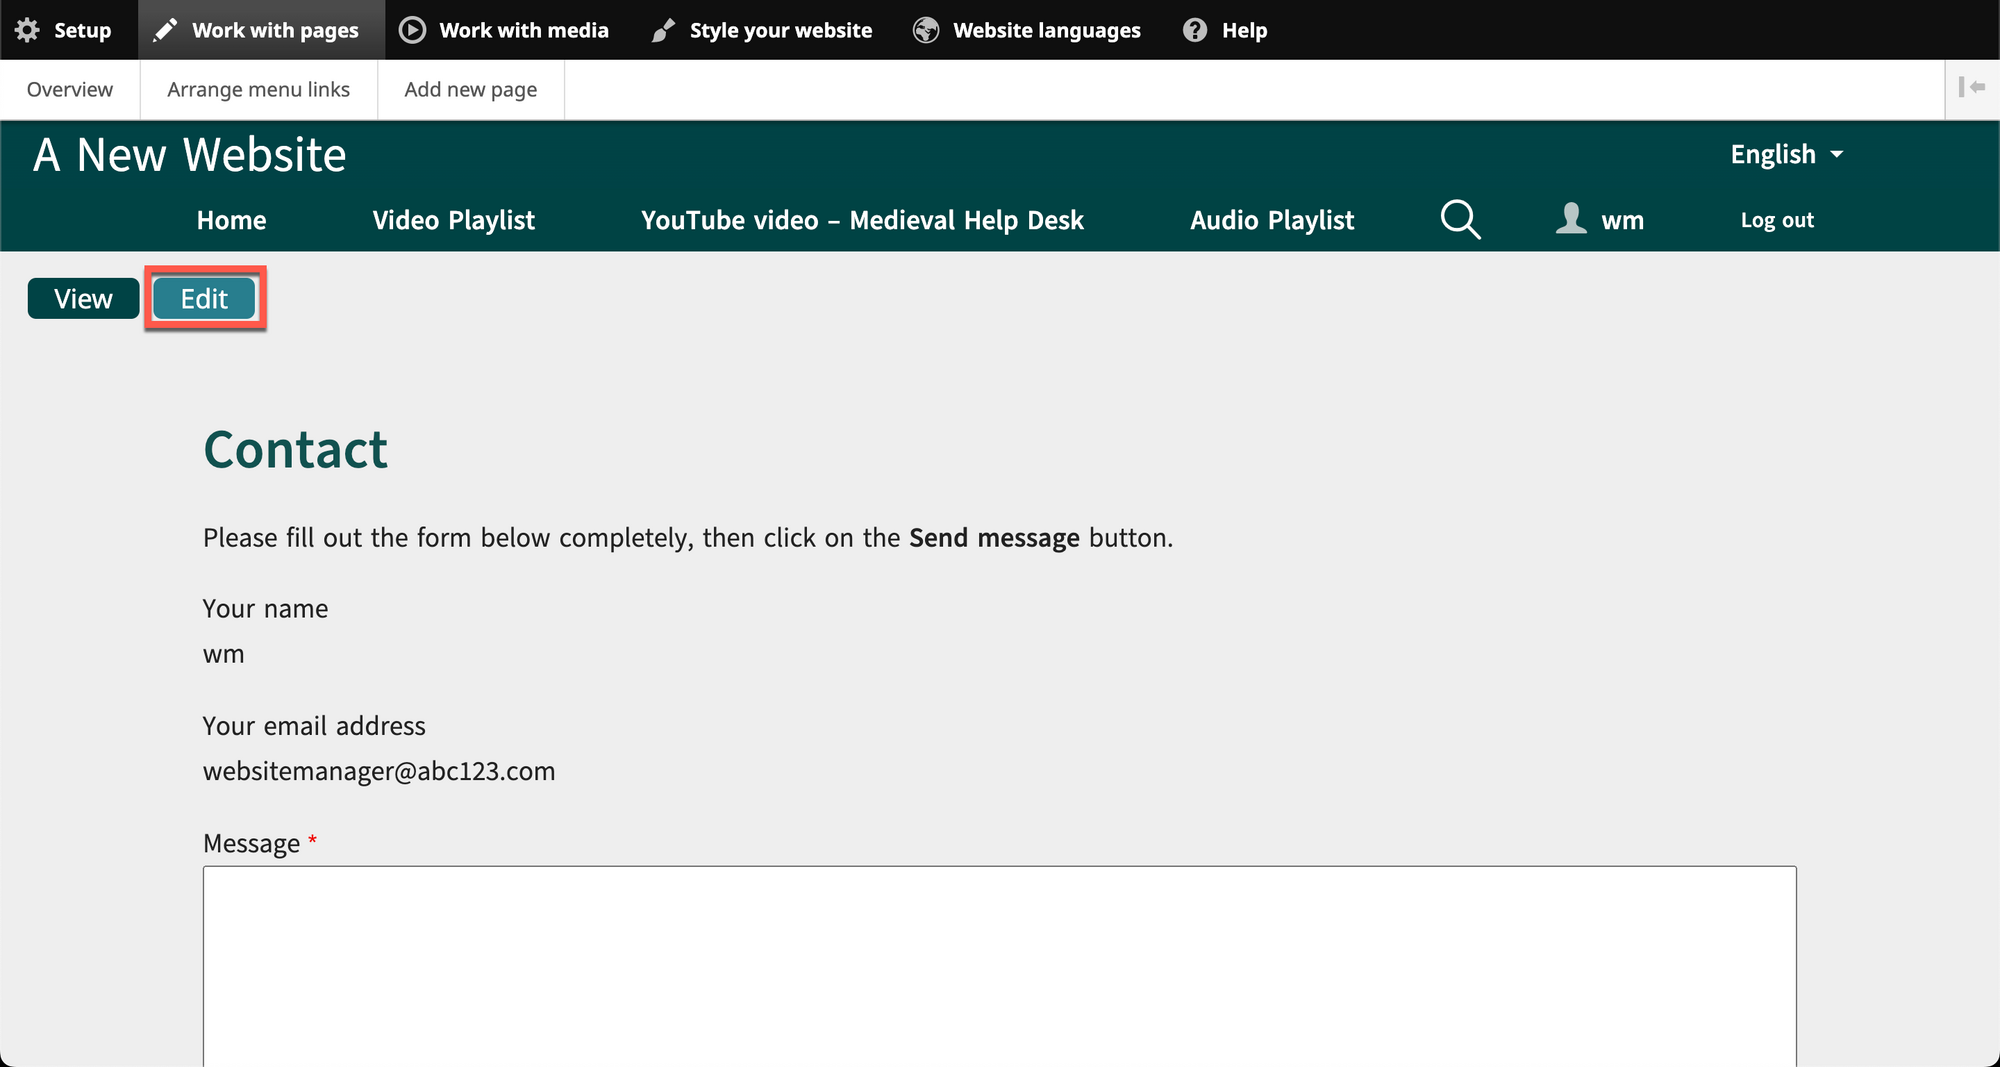
a) Note that, as you are logged in to work on the website, your username and email address are already filled in. Website visitors will see blank fields, as shown above.
6. Click on the Edit button at the upper left of the screen.
7. A new screen appears with options to edit the text above and below the Contact form itself.
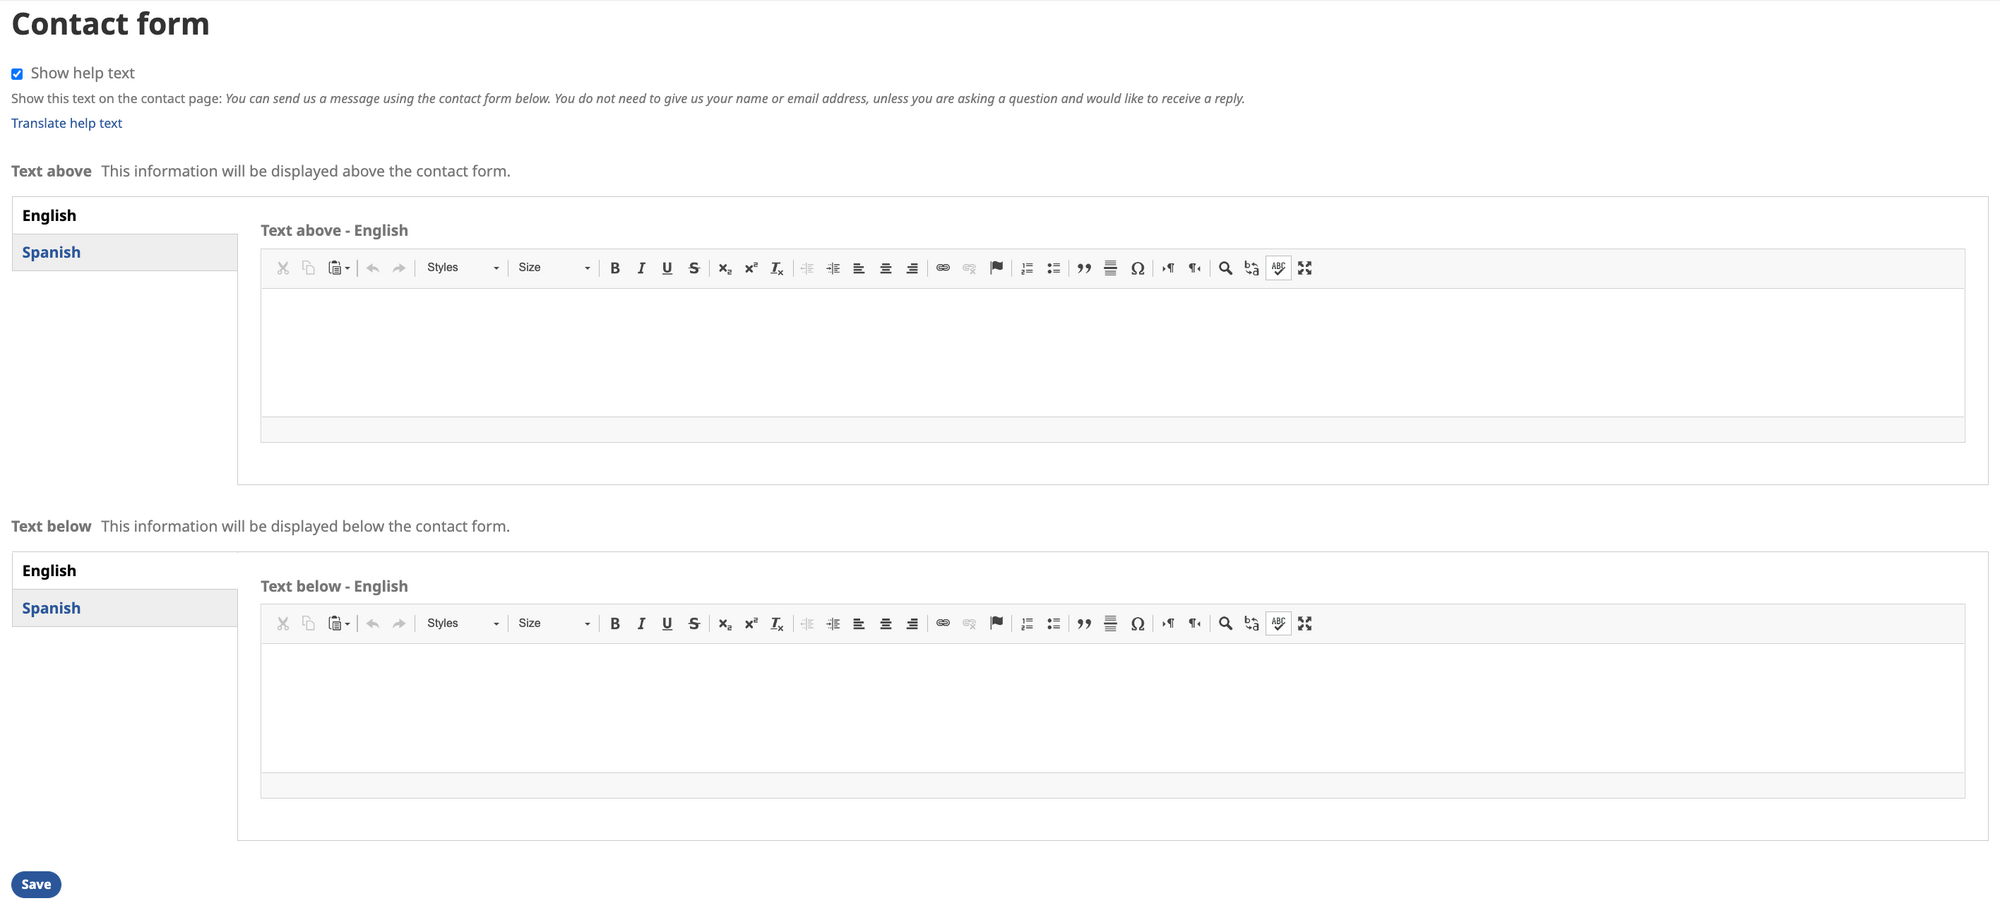
8. First decide if you want to keep the system-generated help text as stated at the top of the screen.
a) If not, deselect the check box.
b) If you keep the system-generated help text and you need to translate it to other languages, click on the link Translate help text.
(1) You will be taken to the correct section of Website languages => Translate interface to do this. Remember to save your work there.
(2) Use your browser’s Back button to return to editing the Contact page.
9. To add text above the Contact form, use the upper set of text editor boxes, titled Text above.
a) Provide the same message in all Navigation Languages by clicking on the tabs at left to change from one language to another.
10. To add text below the Contact form, use the lower set of text editor boxes, titled Text below.
a) Provide the same message in all Navigation Languages by clicking on the tabs at left to change from one language to another.
11. When you are finished, click on the Save button at the bottom left of the screen.
12. You will return to the preview of the Contact page, and you will now see any changes you made.
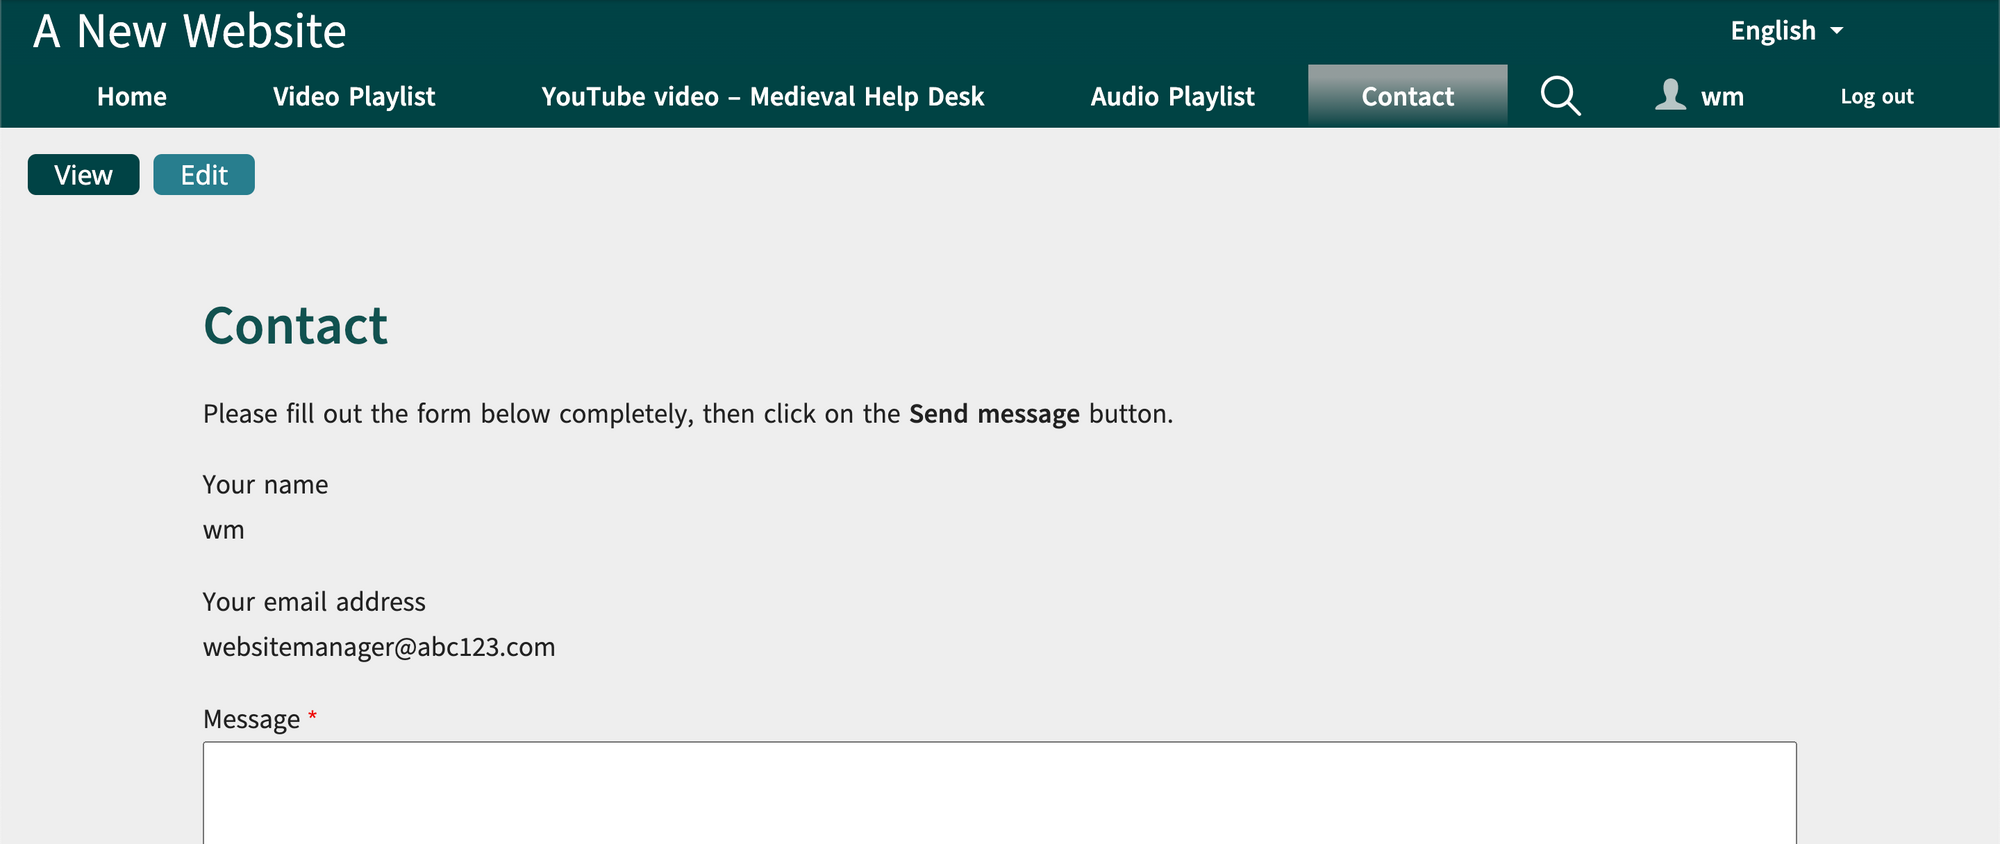
13. Website visitors will see the Contact form with blank fields.
