Page Content – Audio
Click on a section title to jump down the web-page:
A. Introduction
1. In Chapter 6, you learned some basic ways to add content to a web page.
2. In this chapter, you will learn several ways to insert audio content on a page.
3. Audio files are “block content”; you may insert an audio Content block in any area of a section layout.
4. Although you may upload audio files as you insert them on a page, we recommend adding them first to your Media Library (Chapter 5), then following the instructions in this chapter to insert them on a page.
B. Single audio files
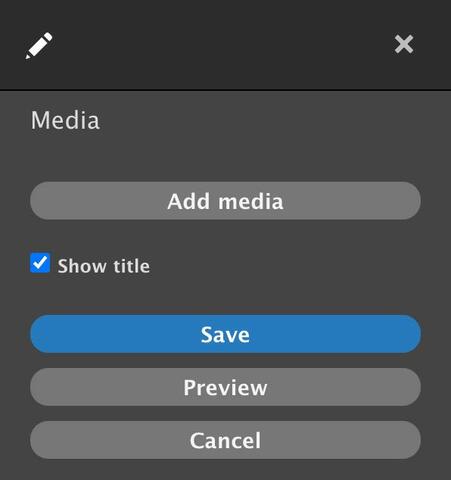
1. Select the Content block to which you want to add an audio file by clicking on a + Add content link.
2. A sidebar opens, displaying the types of block content.
3. Click on the option Audio.
4. A new sidebar opens with features to select an audio file.
5. Click on the Add media button.
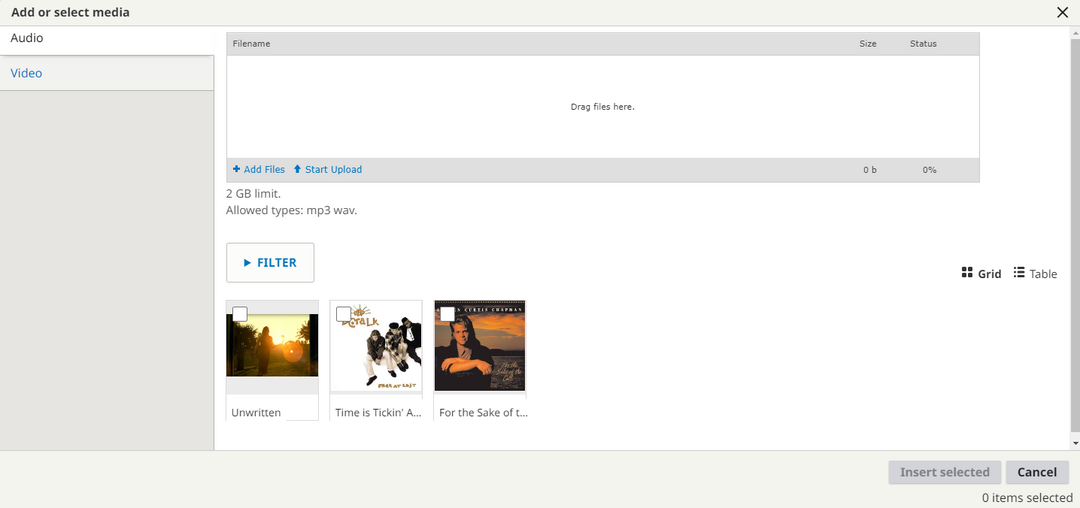
a) The Add or select media working box opens.
b) You may use the upper section of the working box to select an audio file from your computer.
c) If you have already uploaded audio files to your website, they will appear in the lower section of the working box.
d) Select an audio file by clicking on the square in the upper left corner of the video thumbnail.
e) Click on the Insert selected button at bottom left of the working box.
f) The audio now appears in both the layout panel on the left and in the sidebar on the right.
6. In the sidebar, check or uncheck the box to Show title.
7. Click on the Save button at the bottom of the sidebar.
8. Click on the Save button on the Layout Editor screen.
9. Your work appears on a preview of the page.
10. Audio player controls:
a) Play an audio on a page by clicking on the Play icon at the left end of the audio player.
b) Other player controls (pause/replay; volume; progress bar; download options; playing speed) are located on the player bar.
C. Audio playlist
1. Select the Content block to which you want to add an audio playlist by clicking on a + Add content link.
2. A sidebar opens, displaying the types of block content.
3. Click on the option Playlist.
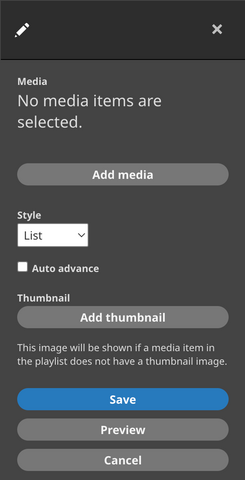
4. A new sidebar opens with features to configure a playlist.
5. Click on the Add media button.
a) The Add or select media working box opens.
b) Select Audio at the upper left of the working box.
c) You may use the upper section of the working box to select audio files from your computer.
d) If you have already uploaded audio files to your website, they will appear in the lower section of the working box.
e) Select audios for the playlist by clicking on the square in the upper left corner of the audio thumbnails.
f) Click on the Insert selected button at bottom left of the working box.
g) The audio playlist now appears in both the layout panel on the left and in the sidebar on the right.
6. In the sidebar, choose a display style from the drop-down list.
a) List – Places list of items at the right side of the player frame
b) Grid – Places list of items below the player frame
c) Compact – Displays the playlist in a small player bar similar to the single audio player
7. In the sidebar, check or uncheck the box to preset Auto advance.
8. If some of the items in the playlist do not have their own thumbnail image, you may choose to add a playlist thumbnail image to replace the simple system video image.
a) In the sidebar, click on the Add thumbnail button.
b) In the pop-up box, either upload an image from your computer or choose one from the images previously uploaded to the website.
c) Click on the Insert selected button.
9. Click on the Save button at the bottom of the sidebar.
10. Click on the Save button on the Layout Editor screen.
11. Your work appears on a preview of the page.
12. Audio player controls:
a) Play an audio on a page by clicking on the Play icon at the upper left of the player frame.
b) Other player controls (pause/replay; volume; progress bar; download options; playing speed) are located at the bottom of the player frame.
13. In List and Grid styles, click on item on the playlist to play it.
14. In Compact style (shown above), click on the title of the item at the left to open a drop-down list with the other items on the playlist.
D. FCBH audio player
1. Wildfire has a special arrangement with Faith Comes By Hearing (FCBH) to present their Bible recordings on our websites via a streaming link to their servers.
2. Select the Content block to which you want to add a FCBH player by clicking on a + Add content link.
3. A sidebar opens, displaying the types of block content.
4. Click on the option FCBH Audio Player.
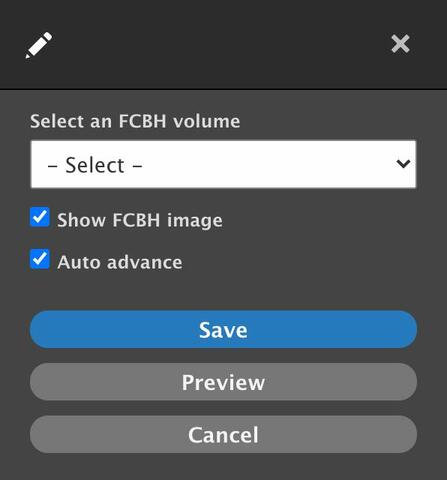
5. A new sidebar opens with features to select a language volume for the FCBH player.
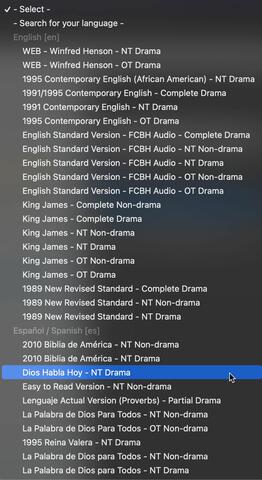
6. Click on the drop-down list to select a volume.
a) Available recordings in the Navigational Languages of your website are preloaded.
1) Click on one of these to select it.
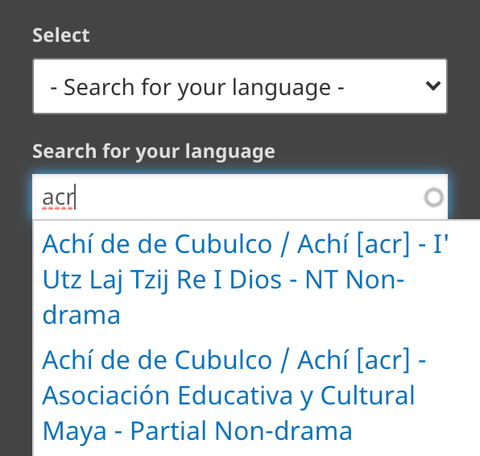
b) You may select a volume in another language by clicking on Search for your language.
1) In the new space that appears, write the language name or three-letter Ethnologue code.
2) Available volumes appear under the space.
3) Click on one to select it.
7. In the sidebar, check or uncheck the box to Show FCBH image.
8. In the sidebar, check or uncheck the box to Auto advance from one chapter to another.
9. Click on the Save button at the bottom of the sidebar.
10. We recommend that you include a Text content block on the page with brief instructions for using the FCBH audio player.
Example text: Use the media player at the right to listen to the New Testament in Spanish. Click on the arrowhead to play. Click on the title "Matthew" to see a drop-down list of all the books and chapters available.
11. Click on the Save button on the Layout Editor screen.
12. Your work appears on a preview of the page.
13. FCBH audio player controls:
a) Play the FCBH volume by clicking on the Play icon at the upper left of the player.
b) Open and explore the volume contents (Bible books and chapters) by clicking on the title Matthew inside the player.
c) Other player controls (jump forward and back; volume; progress bar; playing speed; download options; auto-advance preference) are also located on the player.


